Posts

Showing posts from 2017

3D Fox

Image
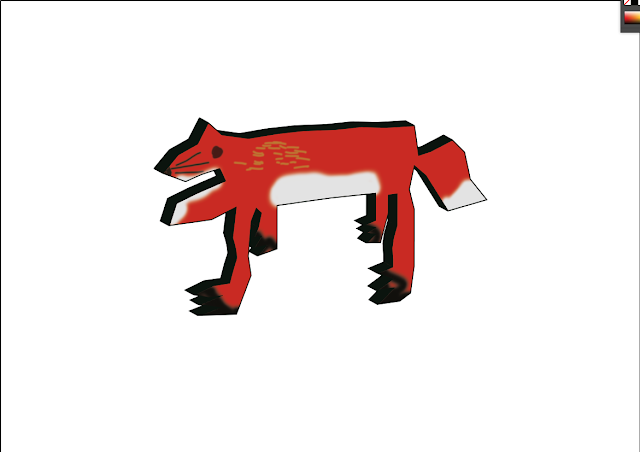
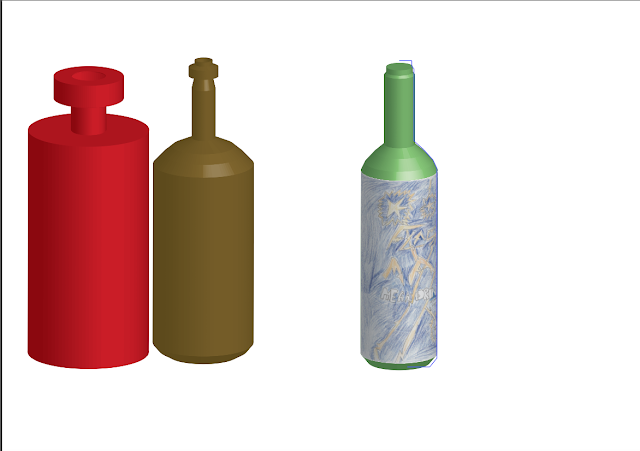
Today I drew an image of a fox using extrude and bevel. I drew it with a pen tool and I made it into 3D using extrude and bevel. This software was in Adobe Illustrator. Then I copied and pasted the picture into Photoshop. I edited the picture and copied and pasted it into illustrator, made it as a symbol. I went on extrude and bevel then I added a symbol on it.   

I got a plan!

Today I am going to design a label of a bottle. It's going to be on a fresh piece of paper. It's going to be very flashy. I'm going to put flash on the title. Then a lemon flashing on the side. Then colour it blue and yellow.

Bottle Design

Image
Today I learnt how to design a bottle using the map tools I used. The tools I used was 3D revolve, pen tool and map art. Here is what it looks like:

The Bauble

Image
I made a bauble and it's very good. The good thing about making a bauble is it's very simple to make mapping all the images. Once I made it, it turned out to be nice with a symbol on it. The tools I used is shaping, eraser, 3D revolve and map art. One of the improvements are accurate drawing, bold text and making the blue bauble the same as the red bauble.

Cube Design Test

Image
There was a checklist of how to make a dice. I opened up the software, Adobe Illustrator. I set up a new file. I used the rectangle to make square 50mm x 50mm on the art board. Also, I used both tools, extrude and bevel filter to make a square into the cube. That was the first task I had to do. Now, for the second task, I added the images from the folder. I placed the pictures to Illustrator, removing the link from its picture. I turned the pictures into symbols by placing them in the symbol. I placed them inside the cube. That was the final task I had to do. 

Dice

Image
Today I designed a dice for young male youths. I had to make the symbols in order to put them in the symbol section. Unfortunately, I haven't finished the dice yet so I have a triple to go. I also did mapping. Here are the designs for the dice. Here are the dices:

3D Shape Designing

Today I was asked to make 3D shapes in Adobe Illustrator. Here is how to do it: 1.Open Illustrator 2. You click on the rectangle tool. 3. Add your favourite colour and remove stroke 4. Click on the art board and type 50mm 5. Select the shape 6. Go to effect>3D>Extrude and brevel 7. Turn on preview an type 50mm 8. Here you have it! A 3D shape Also there are types of styles I did. I did Off Axis front, Isometric Left, Off Axis Top, Isometric Top and Isometric Bottom.

Alien 3D Modeling

Image
Today I discussed with my peers about 3D shapes. Then we talked about a story called The Alien garden.  After that I designed my idea where is it set. I used paper, glue, foam and the sheets of form I cut out on. I cut a leaf shape. I cut  out the foam to make the jelly. I also cut out three shapes to make the cheese. The shapes were 2 squares and a triangle. Also I used a piece of string to make a jungle rope line. I wanted the palm tree to be made out of gold, unfortunately there was no gold. So I used paper instead. Also I wanted the trees made of steel but there was no silver. So again I used paper instead. This is my brainstorm.

Thaumatrope

Today I made a thaumatrope. A thaumatrope is a scientific toy that came in the 19th century. Here is what it looks like.

Animation Finish! II The Sounds

Today I have added up my sounds to the video. How did I add my sounds to the video? I downloaded sounds from the computer from the website called freesounds. I had to register for freesound in order to download the sounds. Another improvement is turn up the volume on the second scene or download another sound which is suitable. Here is my video. Enjoy!

The Deadline Finale! Be able to comment on own work

Has my team completed the animation to the deadline specified on the brief? Yes, my team has completed the animation to the deadline specified on the brief. Did each member of the team work together? Yes they did work together.  How? They work together by discussing some of our design ideas for our animation. I kept my records by planning what we are going to do. Did each member of the team put in the great effort and took it seriously? Yes, they put in the great effort and took it seriously. How did each member knew what to do? They knew what to do by telling the group what they were going to do next in order to meet the deadline. Also, they kept the minutes sheet to keep in touch with the updates.   

Animation Finish!

Today I have finally finished my healthy animation using all the tools I used. The tools I used were video layer, layer, paintbrush tool, position tool, opacity tool, key frames current time indicator. Here is my video.     What went well? The sequence was good meaning all accurate times. I wanted to make the quality but it really didn't work out very well. Although the whole of animation worked well. I need to add the sounds but I will soon learn that. What are the improvements? Delay some of the scenes Concentrate on the drawing more Add sounds (which we haven't learnt yet) Have photographic remembrance

6/3/2017

Today I made a title for the healthy living animated project and I'm not that finished yet. I used photoshop for this type of project. The tools I've used: Paintbrush Bucket fill layer video timeline I have already exported my two videos, one for football and one for no fatty food animation. They are not ready to be posted to blogspot. The rest I haven't finished yet. But they will be done next week.

20/7/2017 Production

Today I animated my first bit of the scene. It was chips cannot eat. I know it's a bit harsh though. Then I finished off my football scene. I done a bunch of stickmen in a stadium watching football. In the next session I did an animation on the football. This technique is using puppet warp in Photoshop. Here how to do it: Draw a Character on transparent layer Duplicate layer Go to edit then puppet warp Click pins on the character Reposition the character click ok Now I can animate this using the instructions provided.

6th February 2017 Assessment

Today I have finished off with my storyboard by adding bits of football. This was about healthy lifestyle. Then I started animated my first shot of the film, football. I will plan to animate the other shots later on this is my video: But it is not finished yet.

Advertising Techniques

Image
Today I found three techniques for advertising. These three are: Pathos- an emotional advert Logos- a logical reasonable advert Ethos- a credibly and characteristics advert This is an example of pathos: These are the examples of logos: This is an example of ethos:

Face Animation

Today I made a face animation using the tools I used. One of the tools were Opacity, Timeline, Paintbrush, Fill, frames, current red line and hold interpretation.

Animation

Image
Animation Today I did animation. First I did animation on the plane.  First I opened up Photoshop. Then I designed paper on pixels Then I drew the picture and made it smaller Then I remove the white background with magic wand. Then I set the workshop on motion. You will see a timeline Then you click the clock next to position. Then you move the object where you want to stop it. Finally you play the animation. Let's go! Click on it to play.